Best Countertop Compost Bins for Small Kitchens
A countertop compost bin can make food-scrap collection easier when the outdoor bin or community drop-off is not close. In a small kitchen, the best choice is the smallest container that fits your cooking routine, carries comfortably, and can be emptied and washed before scraps become a nuisance.
As an Amazon Associate, The Good Home Doc may earn from qualifying purchases.
Product-category guide
Compare countertop compost bins
Start with the counter footprint and your realistic emptying schedule, then compare lid style, carrying handle, liner fit, removable parts, and cleaning instructions.
This guide is a best-fit comparison framework, not a ranked review or a claim that we tested individual bins. “Compost bin” here means a temporary indoor collection container for scraps that will go to an accepted compost stream. It does not compost food on the counter, eliminate every odor, or prevent pests if scraps sit too long.
Quick Picks by Kitchen Routine
- Best for most small kitchens: a compact 1- to 1.3-gallon pail with a simple lid, sturdy handle, smooth interior, and few crevices.
- Best for frequent emptying: a small open-or-flip-lid scrap bowl that can go to the outdoor bin after each meal.
- Best when counter width is scarce: a slim rectangular bin that sits against the backsplash without blocking outlets or prep space.
- Best for dishwasher-first cleanup: a lightweight bin whose manufacturer explicitly says the removable container or parts are dishwasher-safe.
- Best for cooks using liners: a bin with a rim that holds the intended liner neatly without preventing the lid from closing.
Measure the Space and the Scrap Routine
Measure the exact width and depth you can give up without crowding the sink, cooktop, outlet, or primary cutting area. Check the height with the lid fully open, especially beneath upper cabinets. A bin that fits while closed can still hit a cabinet every time you scrape a cutting board.
Then estimate how much food prep happens between emptying trips. A larger pail reduces trips but keeps scraps indoors longer and consumes more counter space. For many small kitchens, a modest bin emptied often is easier to live with than a large “odor-control” container that becomes heavy and unpleasant to clean.
Comparison Framework
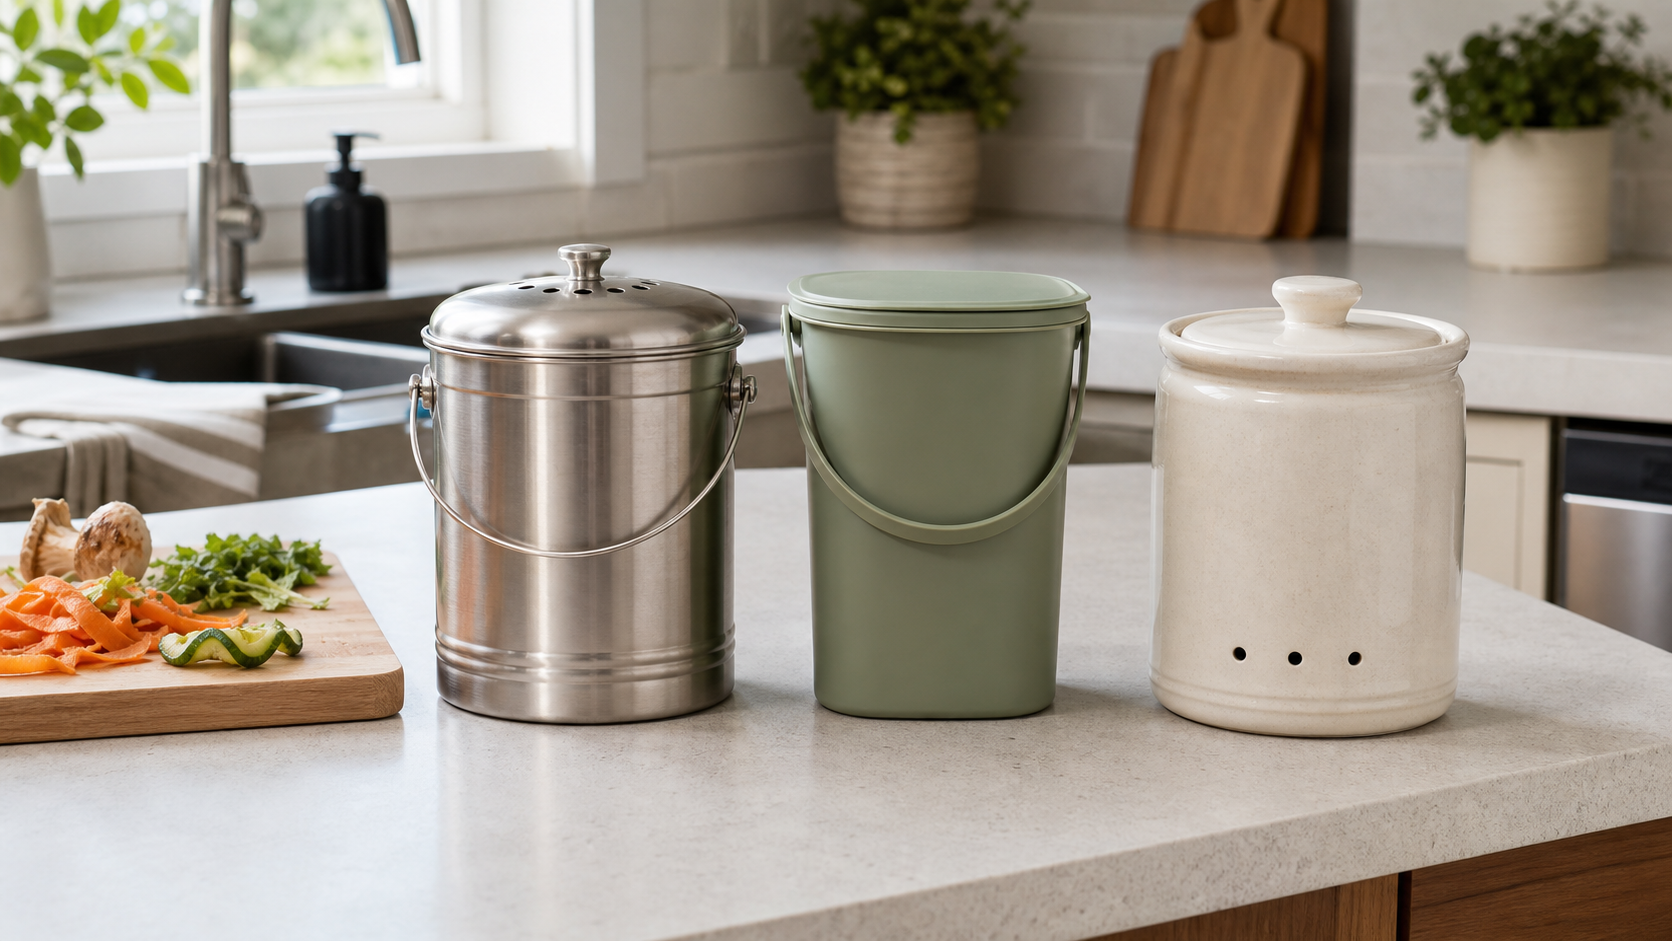
Stainless-Steel Pails
Steel pails are sturdy, resist staining, and often include a carrying handle. Some use a vented lid with a replaceable charcoal filter.
Choose this type if: you want a durable container, carry scraps outside by hand, and do not mind washing around lid seams or replacing filters.
Watch out for: fingerprints, hidden residue beneath lid rims, filters that become another consumable, and product descriptions that overstate odor control.
Smooth Plastic Bins
Plastic bins can be light, inexpensive, and available in narrow shapes. Smooth one-piece interiors are often simpler to rinse than complex filter housings.
Choose this type if: low weight, a slim footprint, and easy carrying matter more than display-worthy materials.
Watch out for: staining, retained smells, hinges that trap residue, and dishwasher heat unless the care instructions specifically allow it.
Ceramic Crocks
Ceramic crocks look at home beside countertop canisters and their glazed interiors can be easy to wipe. They are usually heavier and more breakable than metal or plastic.
Choose this type if: the bin stays in one secure place and you empty it into a separate carrying container.
Watch out for: slippery carrying, chipped rims, heavy full-bin weight, and lids without a secure handle.
Open Bowls and Freezer Containers
A dedicated bowl works for scraps that leave the kitchen immediately. A sealed freezer-safe container can slow odor and fruit-fly activity when local compost rules allow frozen scraps.
Choose this type if: you already empty after each cooking session or have freezer room for a clearly labeled container.
Watch out for: open scraps left overnight, confusing the container with food storage, and condensation during transport.
Must-Have Features
- A usable lid: It should open with your available clearance and come apart for cleaning if residue can reach its seams.
- A smooth food-contact area: Fewer grooves, fasteners, and internal ledges mean fewer places for scraps to collect.
- A secure carrying point: Check the handle and lid arrangement with the bin full; carry from the body if the maker does not rate the lid handle for lifting.
- Clear care instructions: Confirm which parts are hand-wash or dishwasher-safe and whether filters need replacement.
- A footprint that preserves prep space: The bin should not sit where raw-food handling, heat, or splashing makes it harder to use cleanly.
Nice-to-Have Features
- Removable inner bucket: Useful when the outer shell is awkward to wash, provided the inner bucket has no leak-prone seams.
- One-handed lid: Helpful during prep, though simple removable lids are often easier to clean than pedals and hinges.
- Replaceable filter: It may reduce some smells when maintained, but it cannot replace frequent emptying and washing.
- Liner-retaining rim: Keeps an approved liner tidy; first confirm that your compost collector accepts that liner type.
Liners, Filters, and Odor Limits
Check the rules for your municipal program, building collection, or drop-off site before buying liners. “Compostable” packaging is not accepted by every facility, and a liner that needs industrial processing may not belong in a backyard pile. If liners are rejected, a smooth washable bucket may be the simpler choice.
Charcoal filters have a limited service life and need to dry fully after any cleaning allowed by the maker. They can help with everyday smells, but no countertop lid can make old scraps consequence-free. Empty the bin more often during warm weather and after collecting meat, dairy, or other materials only if your receiving program accepts them.
Cleaning and Maintenance
- Empty on a schedule. Do not wait for the container to overflow; frequency matters more than advertised capacity.
- Wipe the rim promptly. Scraps trapped at the lid seal are easy to miss and can keep the lid from closing.
- Wash as directed. Use the maker's care instructions, rinse away residue, and let every part dry before reassembly.
- Inspect filters and hinges. Replace consumables as directed and retire cracked, rusted, or impossible-to-clean parts.
- Clean the counter below. Move the bin regularly so moisture and crumbs do not remain hidden underneath.
Who Should Skip a Countertop Compost Bin
Skip this category if you do not have access to a compost program or a suitable home system, if building rules prohibit scrap storage, or if the only available counter spot crowds food preparation. A sealed freezer container or small lidded container under the sink may fit better, provided it does not obstruct plumbing, leak visibility, or shutoff access.
Also skip the countertop solution when persistent flies, rodents, leaks, or strong odors suggest a broader sanitation or building problem. Remove the food source, follow local disposal guidance, and contact property management or an appropriate qualified professional when the issue continues. A new pail is not pest control.
Bottom Line
For most small kitchens, the best countertop compost bin is compact, smooth inside, easy to carry, and simple enough to wash often. Choose capacity around your real emptying schedule, not the longest interval you hope to manage; verify liner rules locally; and treat filters as maintenance items rather than a promise of an odor-free counter.
For more ways to reduce cleanup friction without filling the kitchen with gadgets, continue with the low-effort home maintenance tools guide.