Best Refrigerator Bins for Narrow Shelves
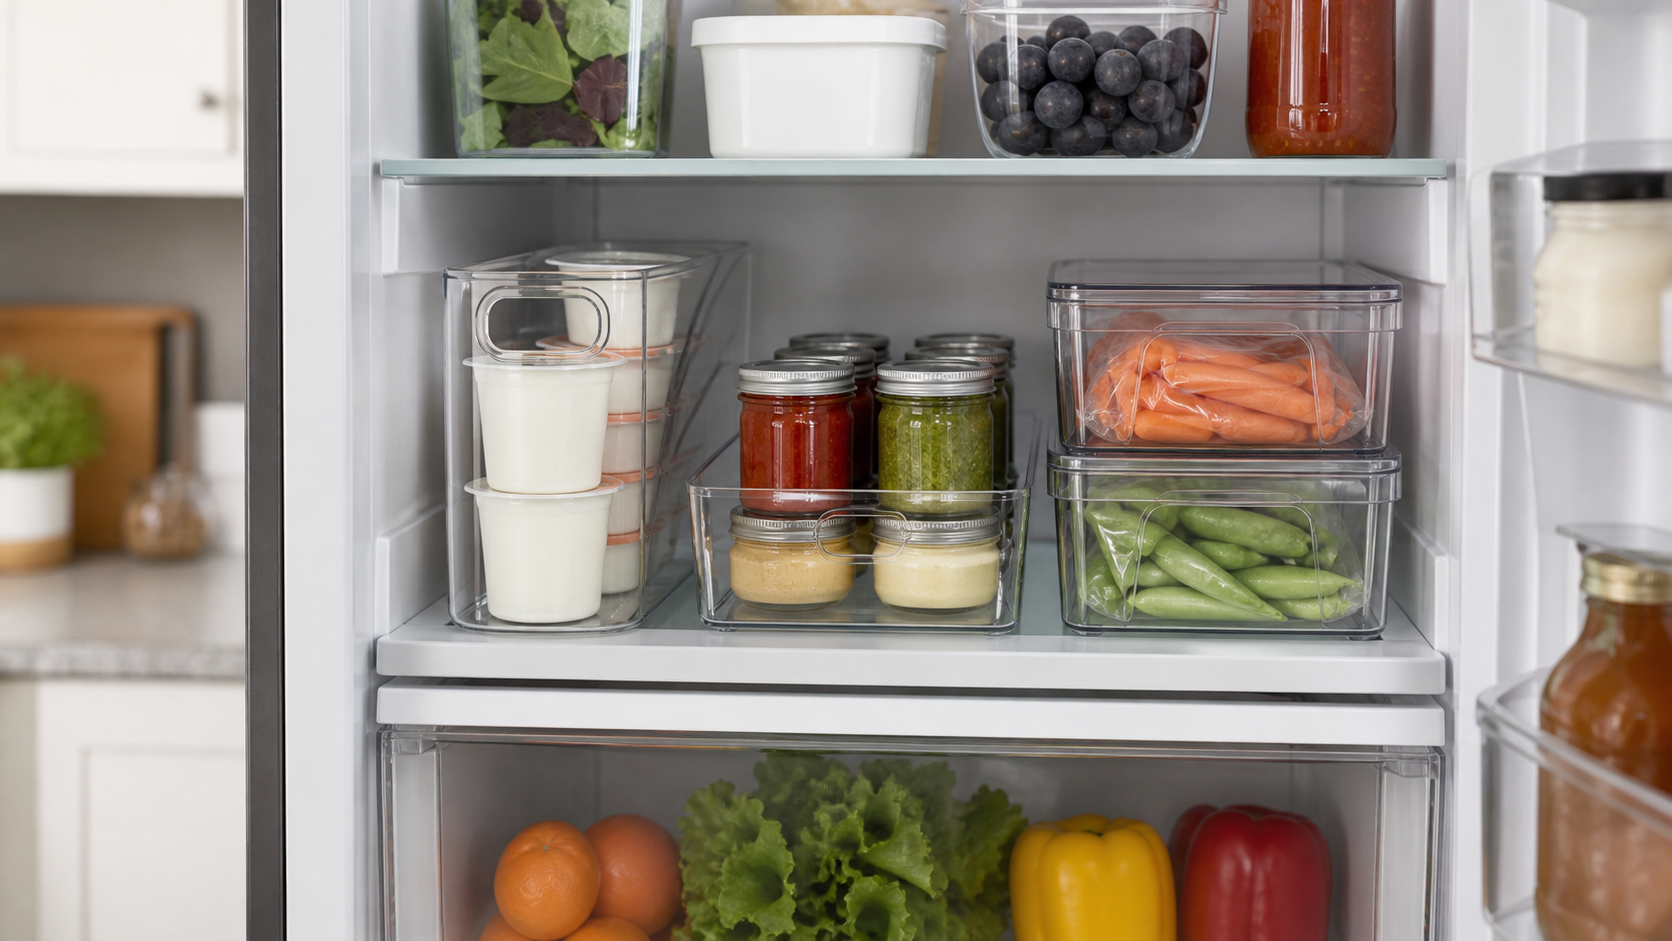
A refrigerator bin earns its space only when it makes small items easier to see and pull out without blocking cold-air paths or wasting shelf depth. Measure the shelf and the opening in front of it first; then compare narrow handled bins, low open trays, and stackable bins by the job they actually need to do.
As an Amazon Associate, The Good Home Doc may earn from qualifying purchases.
Compare the bin format that fits the shelf and food routine:
- Browse category: Compare narrow handled refrigerator binsStart here for yogurt cups, packets, small jars, and items that are easier to reach as one pull-out group.
- Browse category: Compare low open refrigerator binsUseful when quick top access and visibility matter more than stacking.
- Browse category: Compare stackable refrigerator binsConsider only when the stated assembled height, lid or rim design, and shelf clearance all work together.
These are category searches, not tested rankings. Confirm current exterior and interior dimensions, refrigerator-use guidance, material, cleaning instructions, stacking limits, and return terms before buying.
This is a category buying framework, not a list of named winners. Refrigerator layouts and organizer dimensions vary, and no bin should be assumed food-safe, dishwasher-safe, freezer-safe, or suitable for a particular temperature unless its current manufacturer instructions say so. Bins organize food; they do not extend its safe storage time.
Quick Best-Fit Guide
- Best for small packaged items: a narrow handled bin that can slide out without catching the door, shelf lip, or neighboring bin.
- Best for frequent top access: a low open bin with enough wall height to contain items but not hide labels.
- Best for using vertical clearance: a genuinely stackable format whose full assembled height leaves room to lift or slide out the contents.
- Best for produce: a bin specifically permitted for that use, with a cleaning routine and airflow pattern that suit the food and refrigerator guidance.
- Best for an already crowded refrigerator: skip buying a set until expired items, duplicate condiments, and shelf positions have been reviewed.
Measure the Shelf, Opening, and Pull-Out Path
Record usable shelf width, depth, and vertical clearance—not just the refrigerator's interior dimensions. Measure between shelf supports, light housings, temperature controls, water-filter covers, and the raised front or back edges of a glass shelf. Leave the clearance required by the appliance manual around vents and sensors.
Then measure the route the bin takes out. A bin may fit on the shelf but fail to clear a door bin, center hinge, crisper edge, or partially opened refrigerator door. If the bin has a projecting handle, count it in the exterior depth. Use a folded cardboard mockup to test whether the planned bin can turn and slide out at the normal door-opening angle.
Comparison Framework
Narrow Handled Bins
Handled bins turn several small items into one pull-out group. They work well for packets, snack cups, jars, or a meal component used together. The tradeoff is lost interior width from tapered sides and handles, plus the temptation to load a long bin too heavily.
Choose this format when: you routinely need items from the back of a narrow shelf and can pull the full bin straight out. Skip it when: the door does not open far enough, the handle collides with a door bin, or lifting a loaded bin would be awkward.
Low Open Bins and Trays
Low walls make labels and contents visible while containing loose packages that otherwise spread across the shelf. They are simpler to reach into than tall bins, but they do less to stabilize bottles and can allow a small spill to spread.
Choose this format when: the shelf is used many times a day and top access matters. Skip it when: tall items tip easily or the bin's shallow edge creates a false sense of spill containment.
Stackable Bins
Stacking can use a tall shelf more efficiently, especially for light and predictable contents. But some products called stackable require lids, rails, or matching rims, and the usable opening may shrink once another bin sits above it. A stack that must be dismantled for every snack is not efficient.
Choose this format when: the maker documents how the pieces stack and the lower bin stays accessible. Skip it when: the stack crowds a vent, exceeds the product's stated limit, or places heavy containers above fragile food.
Divided or Specialty Bins
Built-in dividers can keep small packets upright, but fixed compartments also waste space when package sizes change. Egg, can, bottle, and produce organizers should be judged against the refrigerator maker's storage guidance and the food's packaging requirements, not the shape alone.
Choose this format when: the same item and quantity recur every week. Skip it when: your groceries change often or the specialty shape solves a visual problem without improving access.
Must-Have Buying Checks
- Complete exterior dimensions: Width, depth, height, handle projection, lid, and stacking hardware must fit the shelf and exit path.
- Useful interior space: Tapered walls and molded handles can make the usable cavity much smaller than the outside footprint.
- Documented cold-use guidance: Confirm the manufacturer permits refrigerator use and follow any temperature or food-contact limitations.
- Easy cleaning: Rounded corners and removable parts are easier to wash and fully dry than narrow seams and enclosed rails.
- Visible contents: Clear or low-sided bins reduce forgotten food only when labels and dates remain easy to inspect.
- Stable loading: The bin should sit flat on the actual shelf and remain manageable at the weight you plan to store.
Airflow and Food-Safety Limits
Do not cover vents, sensors, lights, drain paths, or required gaps. Large solid bins packed edge to edge can change how air moves around the shelf. Follow the refrigerator manual for shelf loading and placement, and avoid pushing food against surfaces the manual says to keep clear.
An organizer does not make unsafe storage safe. Keep foods in appropriate packaging, follow current food-storage guidance, clean spills promptly, and discard food when its safety is uncertain. If the refrigerator cannot maintain the recommended temperature, address the appliance problem instead of reorganizing around it.
Cleaning and Maintenance
Check whether the bin is hand-wash only or allowed in a dishwasher, and note any upper-rack or temperature limit. Wash with a method permitted by the manufacturer, rinse away residue, and dry the bin completely before returning it. Inspect handles, corners, stacking rails, and lids for cracks that trap residue or weaken a loaded bin.
A useful routine is to assign each bin one plain job, label it only if that helps the household, and empty it fully during regular refrigerator cleaning. Avoid adding so many bins that every cleanup requires disassembling a rigid grid.
Who Should Skip Refrigerator Bins
- Skip a multipack when only one shelf or one recurring category needs help; unused matching bins create clutter elsewhere.
- Skip tall solid bins when they hide labels, dates, vents, or the refrigerator's rear area from routine inspection.
- Skip stackable formats when anyone in the household cannot comfortably lift, slide, or restack them.
- Skip specialty dispensers if groceries change weekly or if items must be forced out of their original packaging.
- Skip organizers as the first fix when the refrigerator is overfilled, not cooling correctly, leaking, or overdue for cleaning.
Bottom Line
For most narrow refrigerator shelves, begin with one handled bin for a repeat group of small packaged items or one low open bin for quick access. Buy only after measuring the shelf, the door-opening path, and the usable interior of the bin. Keep vents and controls clear, follow current cold-use and cleaning instructions, and add a stack only when the lower level remains genuinely accessible.